
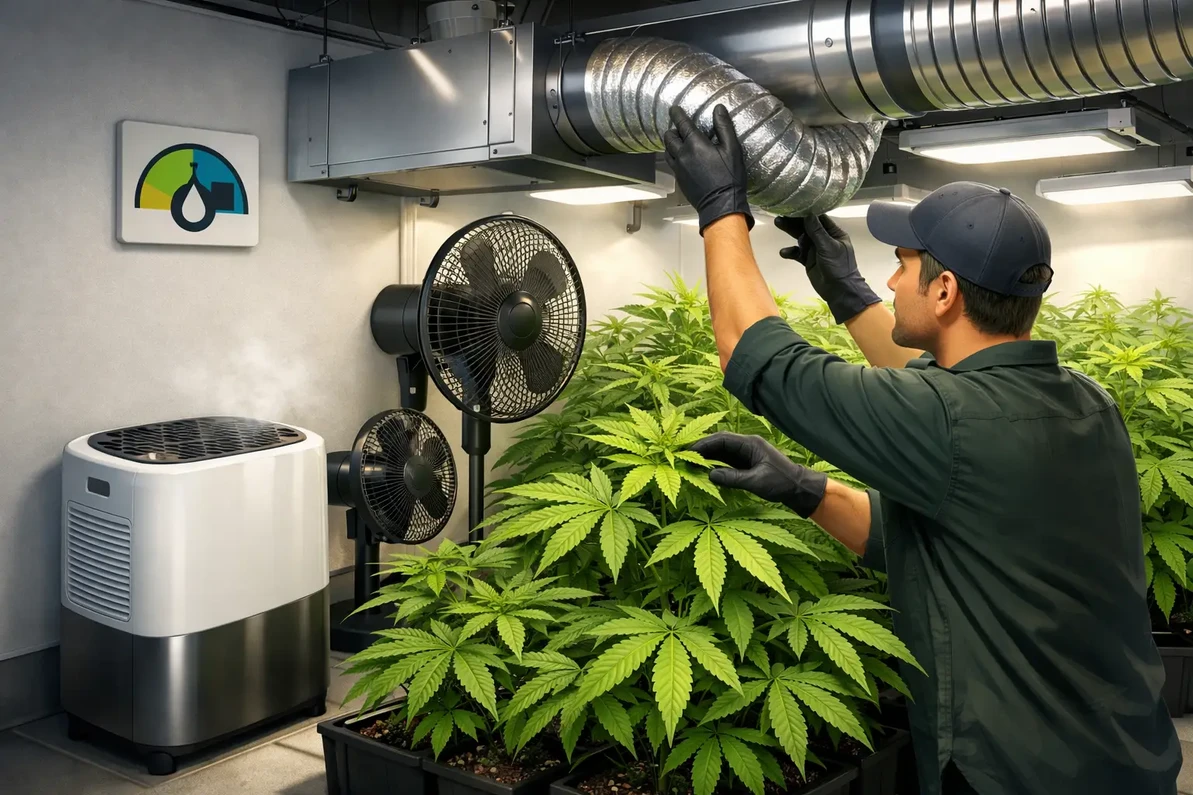
How to Reduce Grow Room Humidity Without Mold
Condensation on ductwork, wet walls, and a hygrometer that climbs after lights-out are not minor grow room issues. They are signs that the room is producing more moisture than its ventilation and drying equipment can remove. Knowing how to reduce grow room humidity starts with treating moisture as an engineering load, not simply turning up a fan.
For cannabis, hemp, flowers, and other specialty crops, high relative humidity can slow transpiration, trigger condensation, and create favorable conditions for powdery mildew, botrytis, and other crop-damaging pathogens. The right correction depends on room volume, plant canopy, irrigation practices, lighting heat, outdoor air conditions, and the actual static pressure in the ventilation system.
Start With the Humidity Target, Not the Equipment
Relative humidity is only part of the decision. Temperature changes the amount of water air can hold, so a room may show an acceptable RH reading during the warm light cycle and reach dew point when temperatures fall at night. That is why growers should monitor temperature and RH at canopy level during both lights-on and lights-off periods.
Vegetative rooms often operate comfortably around 55% to 70% RH, depending on crop stage and environmental strategy. As flowering progresses and dense buds or flowers develop, many growers move toward roughly 40% to 55% RH. A lower number is not automatically better. Excessively dry air can stress plants, increase irrigation demand, and create its own quality problems.
The useful target is the one that supports the crop while maintaining enough margin above dew point to prevent surface condensation. If the room is running 75°F at 55% RH, then dropping to 65°F without removing moisture can push RH sharply higher. Nighttime humidity complaints are frequently temperature-control problems as much as dehumidification problems.
Find Where the Moisture Load Is Coming From
Plants transpire water continuously, with the load increasing as canopy size, lighting intensity, and irrigation activity increase. Open reservoirs, wet floors, uncovered nutrient tanks, drain trays, humidifiers, and outdoor air can add significant moisture as well.
Before specifying a larger exhaust fan or dehumidifier, inspect the room systematically. Look for standing water, leaking irrigation fittings, uninsulated cold surfaces, and condensate lines that are not draining correctly. Check whether the grow room is pulling humid air from an adjacent greenhouse, propagation area, or nonconditioned building space.
A common mistake is assuming a large exhaust fan will solve every humidity issue. Exhaust ventilation only works when the replacement air is drier on an absolute-moisture basis than the room air. In hot, humid climates, bringing in untreated outdoor air can increase the moisture load even while the fan moves substantial CFM.
How to Reduce Grow Room Humidity With Correct Air Exchange
Exhaust ventilation removes warm, moisture-laden air and helps maintain directional airflow. It is essential in many cultivation rooms, but fan selection must account for more than the room's cubic footage.
A basic air-change calculation begins with room volume:
Room volume = length x width x ceiling height
If a 20-foot by 30-foot room has a 10-foot ceiling, its volume is 6,000 cubic feet. One air change per minute would require 6,000 CFM in ideal, free-air conditions. Real installations are not free-air conditions. Carbon filters, louvers, insect screens, light traps, elbows, duct runs, dampers, and undersized intake openings all create static pressure that reduces delivered airflow.
This is where a fan's published performance curve matters. A fan rated at 6,000 CFM at zero static pressure may deliver substantially less airflow through a restrictive carbon filter and duct system. Select equipment based on the required CFM at the expected static pressure, not the largest free-air number on a product page.
Balanced make-up air is equally important. Exhaust fans cannot deliver rated airflow if the room is starved for replacement air. Undersized intake openings can create excessive negative pressure, reduce fan performance, pull unfiltered air through building gaps, and make doors difficult to open. Use properly sized filtered intake louvers, motorized dampers, or a dedicated make-up air system where the application requires controlled outside air.
Use Dehumidification When Outside Air Cannot Carry the Load
In sealed or semi-sealed grow rooms, a dedicated dehumidifier is usually the primary moisture-removal device. The unit should be selected by pints per day or pounds of water removed under the actual operating temperature and RH, not only by a nominal rating tested under different conditions.
Dehumidifier capacity drops as room temperatures fall. A unit that appears adequate during a warm lights-on cycle may struggle during lights-off, when RH is often highest. Plan capacity around the worst-case moisture period, with allowance for crop growth and seasonal changes.
For larger cultivation operations, commercial ducted dehumidification can offer better air distribution and service access than several small portable units. It can also reduce floor congestion and simplify condensate management. The trade-off is a higher initial design requirement: duct sizing, return-air location, service clearance, electrical capacity, and condensate routing all need to be addressed before installation.
Never allow dehumidifier condensate to drain onto the floor or into an open container inside the room. Use a trapped, properly sloped drain connection or condensate pump routed to an approved drain location. Standing condensate adds moisture back to the space and creates a sanitation concern.
Control Temperature, Air Movement, and Nighttime Setbacks
Humidity control is not isolated from cooling. When air cools, RH rises even if no water enters the room. Avoid aggressive nighttime temperature setbacks that bring leaf surfaces or room surfaces close to dew point. A smaller, controlled temperature change can reduce the dehumidification load and lower disease risk.
Horizontal airflow fans should move air uniformly through and below the canopy. Their job is not to exhaust the room. Proper air circulation breaks up stagnant pockets around leaves and flowers, improves temperature uniformity, and helps prevent localized high-RH zones that a single wall-mounted sensor may never detect.
Place sensors at representative canopy height, away from direct discharge air, dehumidifier exhaust, and wet irrigation zones. In larger rooms, use multiple sensors. One sensor near a door or supply vent can produce misleading control decisions for the entire facility.
Avoid These Humidity Control Mistakes
Several recurring field issues prevent otherwise capable equipment from performing as intended:
- Oversizing exhaust without providing sufficient filtered make-up air.
- Venting through restrictive filters, screens, or ductwork without calculating static pressure.
- Installing dehumidifiers with no planned condensate drain route.
- Setting controls based on daytime RH while ignoring lights-off dew point conditions.
- Running circulation fans above the canopy but leaving dense plant zones stagnant.
- Pulling humid outdoor air into the building during weather conditions that require mechanical drying instead.
Variable frequency drives and staged controls can reduce these problems. Instead of running an exhaust fan at full speed continuously, a controller can respond to temperature, RH, time schedules, or pressure requirements. The correct approach depends on whether the room is designed as a ventilated grow space, a sealed cultivation environment, or a hybrid operation.
Verify Performance After Installation
Do not assume the system is working because the fan is running. Measure temperature and RH trends before and after changes, particularly over a full 24-hour cycle. Check room pressure, inspect filters and louvers for restriction, and confirm that exhaust air is actually leaving the building rather than recirculating near an intake.
If RH rises after irrigation, record how long the room takes to recover. If humidity spikes only after lights-out, review temperature setback strategy and dehumidifier capacity. If the room remains humid while exhaust equipment runs continuously, verify delivered CFM under system static pressure and evaluate the moisture content of incoming air.
The best grow room humidity solution is rarely one piece of equipment. It is a matched system of exhaust, make-up air, dehumidification, circulation, cooling, drainage, and controls sized for the crop's real moisture load. A ventilation design review before equipment selection can prevent undersized fans, wasted energy, and expensive crop-loss risk.
Factory Fans Direct - Greenhouse, Cannabis & Hemp Ventilation & Cooling Experts | Contact Mike Miller VP Engineering at Factory Fans Direct for a FREE Project Evaluation 888-849-1233 | Mike@FactoryFansDirect.com
Recent Posts
-

Smart Buildings Architects Recommend Edmonds ecoPOWER Hybrid Ventilation
A rooftop ventilator should not force an all-or-nothing energy decision. Smart Buildings Architects …7th Sep 2026 -
Smart Industrial Buildings Use Edmonds ecoPOWER Hybrid Ventilation
A roof exhaust system can be the difference between a plant that controls heat at the source and one …7th Sep 2026 -
Smart Commercial Buildings Use Edmonds Hybrid Ventilation
A rooftop exhaust fan that only performs when the wind blows is not a complete ventilation strategy. …7th Sep 2026